MyOrg Groups and Users
naus | my Organisation
How to Manage Groups and Users
naus | my Organisation is a platform by Mandalay Technologies that will provide your team with access to naus Applications (such as the Commercial Services Portal) and allows you to administer your users and organisation details.
In this article, we will explain how to manage your users and their permissions to ensure they can access the correct information.
Only Admin level users will have the ability to manage Groups and Users.
Groups
All user permissions within naus | my Organisation are managed via Groups.
Each user must belong to a Group. What the user can access is determined by the permissions that have been created within the Group.
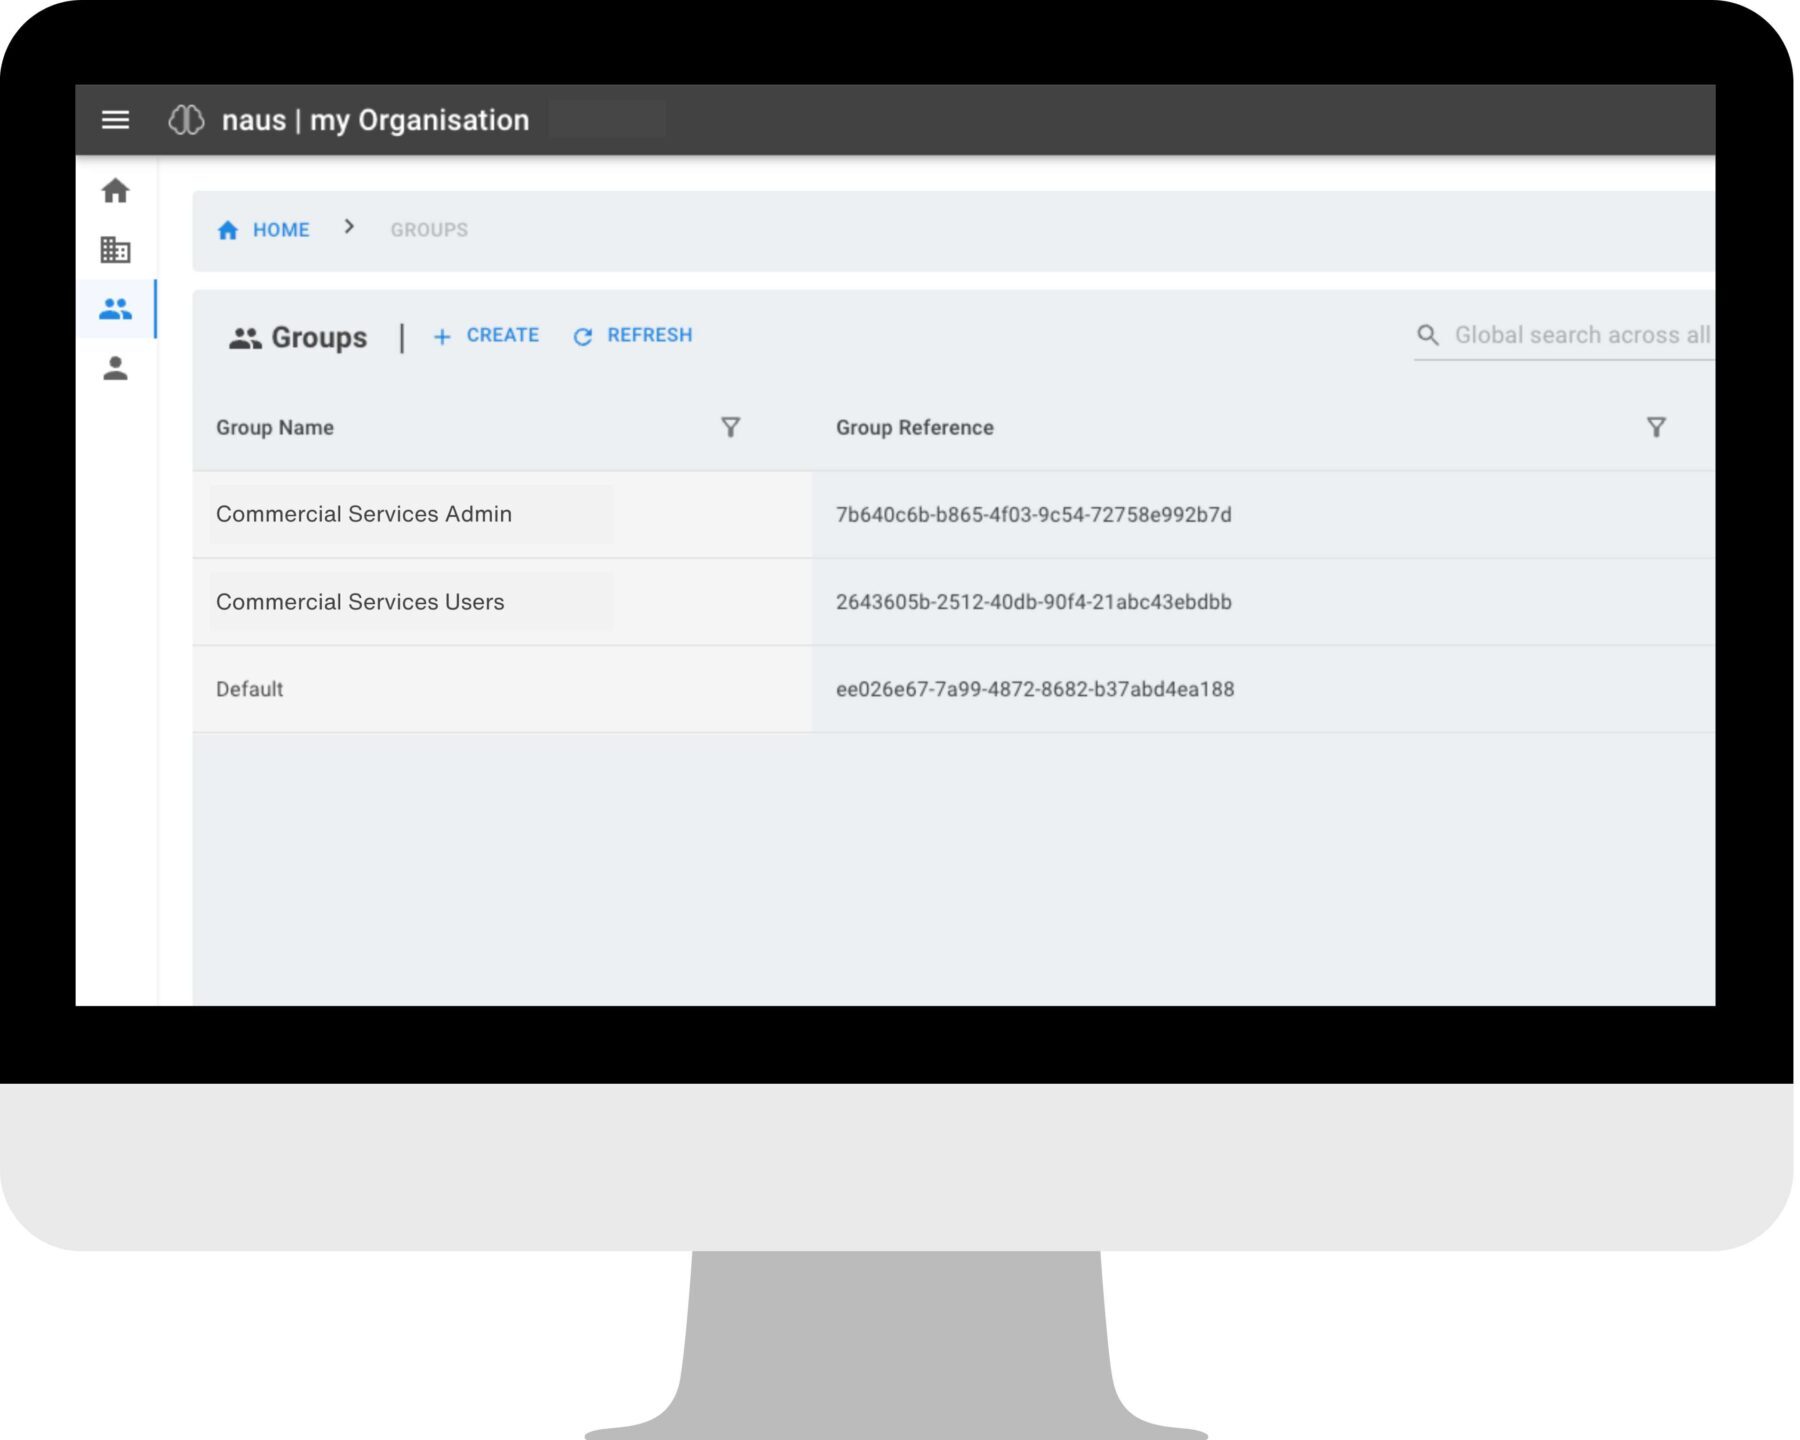
A list of all Groups can be found on the Groups page and can be accessed by clicking on Groups in the left hand menu.

From this screen you can create new groups, see how many members belong to each existing group or click through to view more detailed group information.
Group Detail
To view more detailed group information, click the  icon at the far right-hand side of the screen.
From this screen, you will see basic group information, a list of members who have been added to the group and the permissions that have been assigned to the group.

Members
The members tab will display a list of all users who have been assigned to this group.

Click on the ![]() icon at the far right-hand side of the screen to view a specific user within the group. From here you can view the group that a user belongs to or change their group.
icon at the far right-hand side of the screen to view a specific user within the group. From here you can view the group that a user belongs to or change their group.
Permissions
The Permissions tab will display all permissions that have been assigned to the group.

- Application: This is the name of the application or product that users within this group will be able to access.
- Permission Name: This is the name of the permission that has been applied.
- Role: The role within each application can be set as either Admin or User.
- An Admin role will allow users to administer permissions if permission options exist within the application.
- A User role will give the user permission to access the application.
- Scoped Facility Tenancy: This field is not relevant.
Create a New Group
Follow these steps to create a new Group.
Create the Group
1: Click on the Groups page from the left-hand menu.
2: Click on Create.
3: Enter the name of the new group. [Tip – Give the group a meaningful name such as Commercial Services Users as this will help you to identify the correct group when adding users.]
4: Click Continue. This will create the Group.
Add Permissions to the Group
5: Click on the Permissions tab.
6: Click Add Permission.
7: From the dropdown list, select the appropriate application and role. Then click Add.
- Commercial Services – Admin
- Commercial Services – User
8: Then click Add.
Note: The facility tenancy field is not relevant and will remain greyed out.
Add Members to the Group
9: Adding new members to the group is managed from the Users page. Refer to the next section for more information.
Users
A list of all Users can be found on the Users page and can be accessed by clicking on Users in the left hand menu.
Each user must belong to a Group. What the user can access is determined by the permissions that have been created within the Group.
A list of all Users can be found on the Users page.


User Detail
The Users dashboard provides limited information about each user.
You will see basic information on each user along with the Group they belong to. To see more detail, click the ![]() icon on the far right-hand side.
icon on the far right-hand side.

Create a New User
Follow these steps to add a new user to your organisation.
Invite a New User
1: Click on Users from the left-hand menu.
2: Click Invite.
3: Enter the User’s email address.
4: Then click Continue.
Enter the New User’s Details
5: Enter the User’s first and last names.
By default, all new users will be added to your organisation’s contact list. To learn more about contacts, please read this article.
6: Click Continue.
The new user will receive an email letting them know they have been invited to access the platform. A copy of this email will also be sent to you.

To gain access, your new user will need to follow the steps provided within the email that they receive.
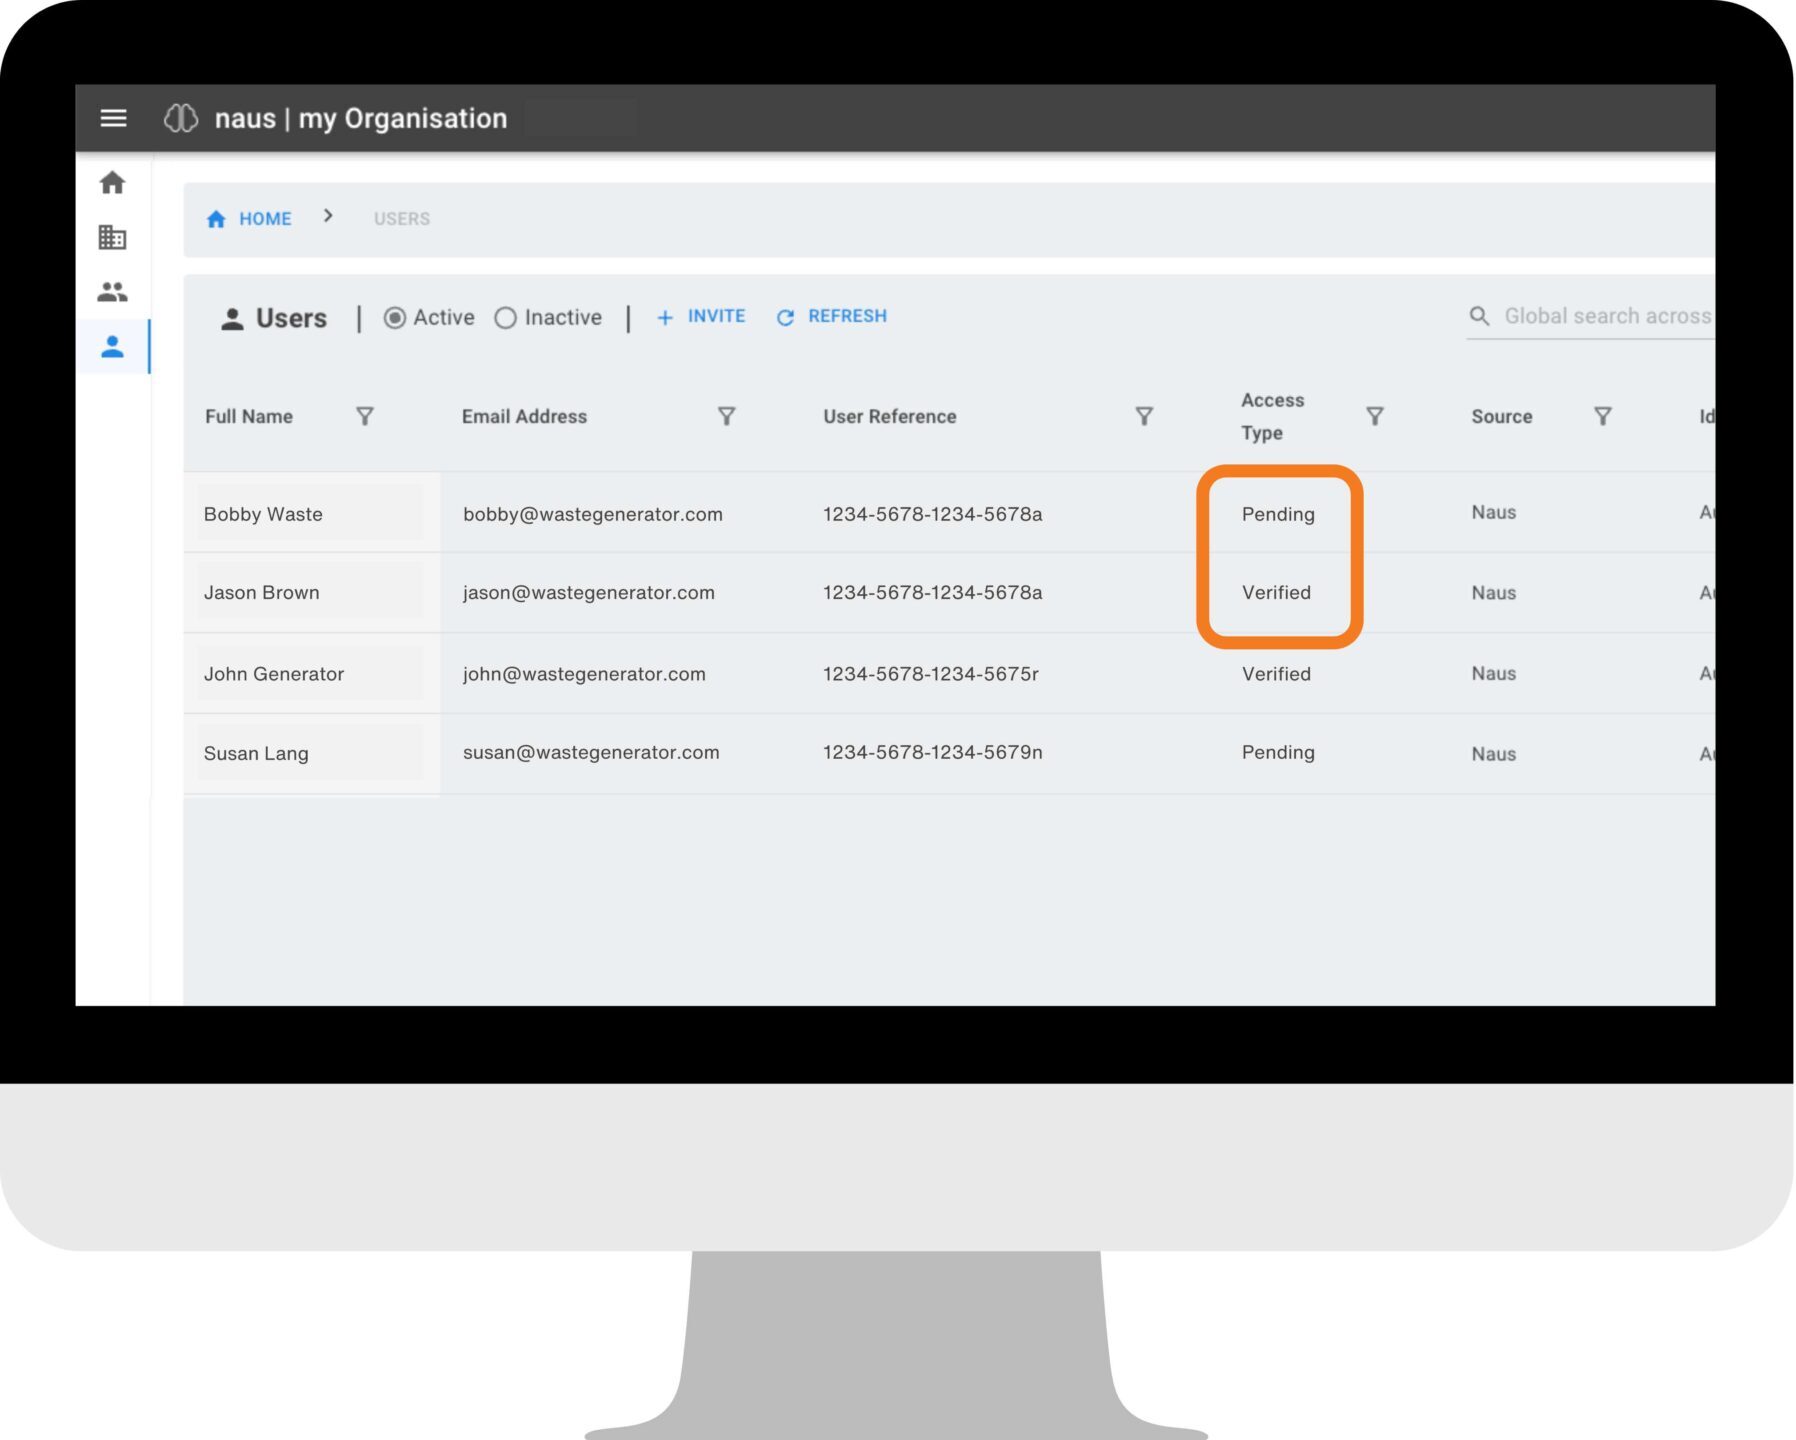
A user’s status will change from Pending to verified once they successfully sign in for the first time.
Add a User to a Group
Users can only belong to one Group.
All new users will be added to a Default group automatically. To ensure users can access the correct applications, we recommend moving them into a Group with appropriate permissions. There is no limit to the number of Groups that you can create.
Select the User
1: Click on Users from the left-hand menu.
2: Locate the user on the Users Dashboard and then click on the ![]() icon on the far right-hand side.
icon on the far right-hand side.
3: If you have lots of users, use the search field (Global Search) at the top right of the screen to make this easier.
Change Their Group
4: Click Change Group. All users will automatically be added to a Default Group. We recommend that you change their group.
5: Click on the group from the dropdown list.
6: Then click Select.
Your user has now been assigned to a Group and will be able to access the correct applications.
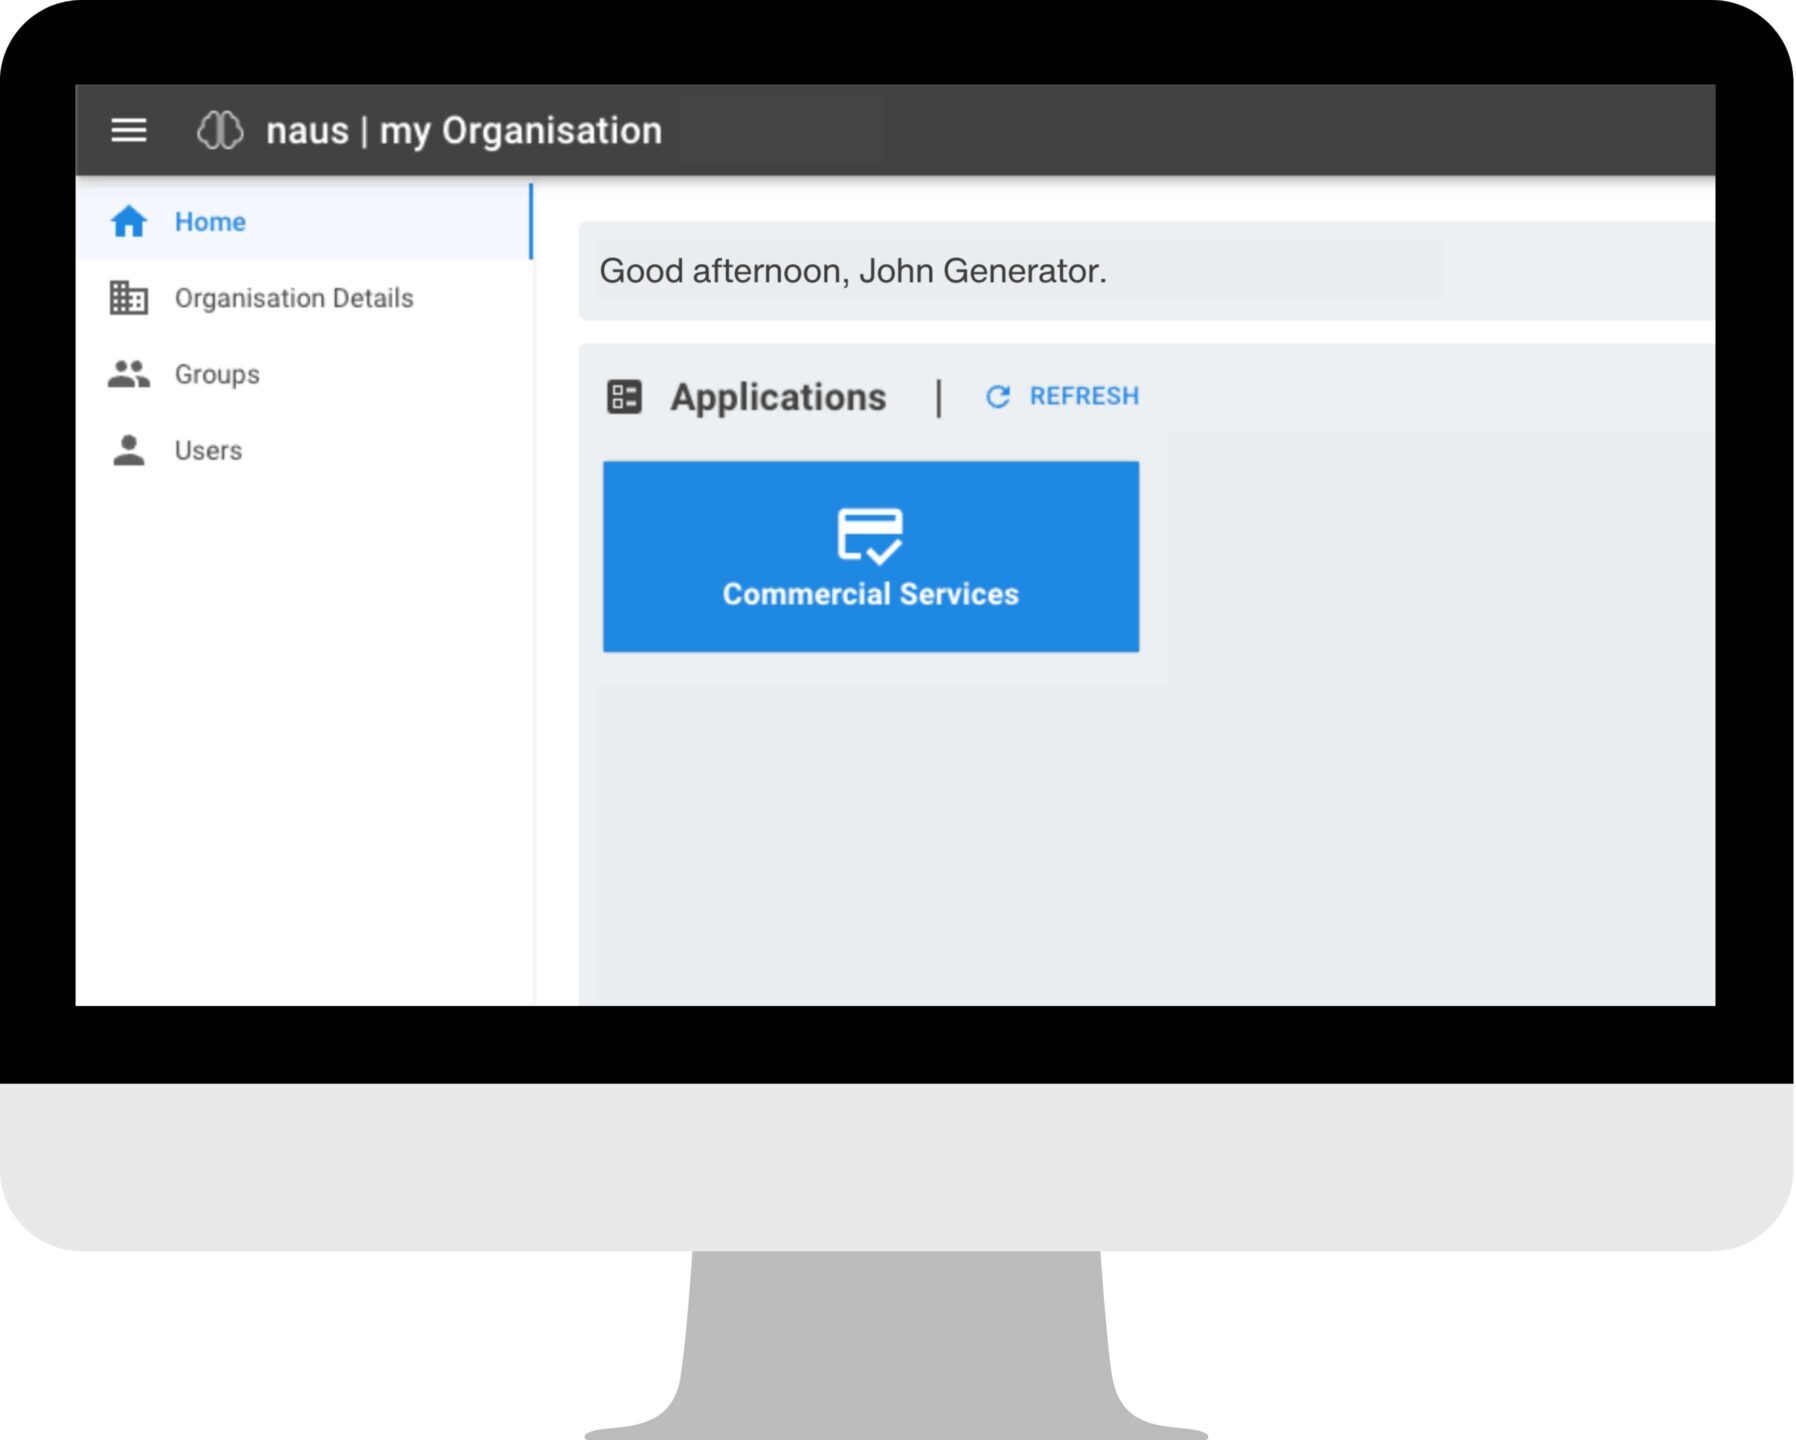
Managing Access to the Commercial Services Portal
Access to the Commercial Services Portal is managed via the Group permissions that you have created.
Once a User is added to the appropriate Group they will be able to access the application.
![]()
Need Assistance?
If you require assistance, please contact the facility who invited you to join Commercial Services.
Find out more
Would you like to know more about the products and services that Mandalay has to offer?